Is this really a course about games? Where are the graphics?
Introduction
[Note: drawing within a canvas was studied in detail during the W3C HTML5 Part 1 course, in week 3.]
Good news! We will add graphics to our game engine in this lesson! To-date we have talked of “basic concepts”; so without further ado, let’s draw something, animate it, and move shapes around the screen 🙂
Let’s do this by including into our framework the same “monster” we used during the HTML5 Part 1 course.
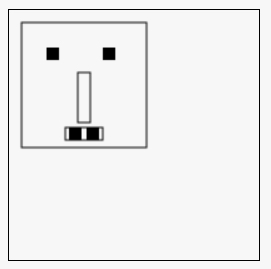
HTML5 canvas basic usage: drawing a monster
How to draw a monster in a canvas: you can try it online at JSBin.
HTML code (declaration of the canvas):
- <!DOCTYPE html>
- <html lang=“en”>
- <head>
- <meta charset=“utf-8”>
- <title>Draw a monster in a canvas</title>
- </head>
- <body>
- <canvas id=“myCanvas” width=“200” height=“200”></canvas>
- </body>
- </html>
The canvas declaration is at line 8. Use attributes to give it a width and a height, but unless you add some CSS properties, you will not see it on the screen because it’s transparent!
Let’s use CSS to reveal the canvas, for example, add a 1px black border around it:
- canvas {
- border: 1px solid black;
- }
And here is a reminder of best practices when using the canvas, as described in the HTML5 Part 1 course:
- Use a function that is called AFTER the page is fully loaded (and the DOM is ready), set a pointer to the canvas node in the DOM.
- Then, get a 2D graphic context for this canvas (the context is an object we will use to draw on the canvas, to set global properties such as color, gradients, patterns and line width).
- Only then can you can draw something,
- Do not forget to use global variables for the canvas and context objects. I also recommend keeping the width and height of the canvas somewhere. These might be useful later.
- For each function that will change the context (color, line width, coordinate system, etc.), start by saving the context, and end by restoring it.
Here is JavaScript code which implements those best practices:
- // useful to have them as global variables
- var canvas, ctx, w, h;
- window.onload = function init() {
- // Called AFTER the page has been loaded
- canvas = document.querySelector(“#myCanvas”);
- // Often useful
- w = canvas.width;
- h = canvas.height;
- // Important, we will draw with this object
- ctx = canvas.getContext(‘2d’);
- // Ready to go!
- // Try to change the parameter values to move
- // the monster
- drawMyMonster(10, 10);
- };
- function drawMyMonster(x, y) {
- // Draw a big monster!
- // Head
- // BEST practice: save the context, use 2D transformations
- ctx.save();
- // Translate the coordinate system, draw relative to it
- ctx.translate(x, y);
- // (0, 0) is the top left corner of the monster.
- ctx.strokeRect(0, 0, 100, 100);
- // Eyes
- ctx.fillRect(20, 20, 10, 10);
- ctx.fillRect(65, 20, 10, 10);
- // Nose
- ctx.strokeRect(45, 40, 10, 40);
- // Mouth
- ctx.strokeRect(35, 84, 30, 10);
- // Teeth
- ctx.fillRect(38, 84, 10, 10);
- ctx.fillRect(52, 84, 10, 10);
- // BEST practice: restore the context
- ctx.restore();
- }
In this small example, we used the context object to draw a monster using the default color (black) and wireframe and filled modes:
- ctx.fillRect(x, y, width, height): draws a rectangle whose top left corner is at (x, y) and whose size is specified by the width andheight parameters; and both outlined by, and filled with, the default color.
- ctx.strokeRect(x, y, width, height): same but in wireframe mode.
- Note that we use (line 30) ctx.translate(x, y) to make it easier to move the monster around. So, all the drawing instructions are coded as if the monster was in (0, 0), at the top left corner of the canvas (look at line 33). We draw the body outline with a rectangle starting from (0, 0). Calling context.translate “changes the coordinate system” by moving the “old (0, 0)” to (x, y) and keeping other coordinates in the same position relative to the origin.
- Line 19: we call the drawMonster function with (10, 10) as parameters, which will cause the original coordinate system to be translated by (10, 10).
- And if we change the coordinate system (this is what the call to ctx.translate(…) does) in a function, it i good practice to always save the previous context at the beginning of the function and restore it at the end of the function (lines 27 and 50).
Animating the monster and including it in our game engine
Ok, now that we know how to move the monster, let’s integrate it into our game engine:
- add the canvas to the HTML page,
- add the content of the init() function to the start() function of the game engine,
- add a few global variables (canvas, ctx, etc.),
- call the drawMonster(…) function from the mainLoop,
- add a random displacement to the x, y position of the monster to see it moving,
- in the main loop, do not forget to clear the canvas before drawing again; this is done using the ctx.clearRect(x, y, width, height)function.
You can try this version online at JSBin.
HTML code:
- <!DOCTYPE html>
- <html lang=“en”>
- <head>
- <meta charset=“utf-8”>
- <title>Trembling monster in the Game Framework</title>
- </head>
- <body>
- <canvas id=“myCanvas” width=“200” height=“200”></canvas>
- </body>
- </html>
JavaScript complete code:
- // Inits
- window.onload = function init() {
- var game = new GF();
- game.start();
- };
- // GAME FRAMEWORK STARTS HERE
- var GF = function(){
- // Vars relative to the canvas
- var canvas, ctx, w, h;
- …
- var measureFPS = function(newTime){
- …
- };
- // Clears the canvas content
- function clearCanvas() {
- ctx.clearRect(0, 0, w, h);
- }
- // Functions for drawing the monster and perhaps other objects
- function drawMyMonster(x, y) {
- …
- }
- var mainLoop = function(time){
- // Main function, called each frame
- measureFPS(time);
- // Clear the canvas
- clearCanvas();
- // Draw the monster
- drawMyMonster(10+Math.random()*10, 10+Math.random()*10);
- // Call the animation loop every 1/60th of second
- requestAnimationFrame(mainLoop);
- };
- var start = function(){
- …
- // Canvas, context etc.
- canvas = document.querySelector(“#myCanvas”);
- // often useful
- w = canvas.width;
- h = canvas.height;
- // important, we will draw with this object
- ctx = canvas.getContext(‘2d’);
- // Start the animation
- requestAnimationFrame(mainLoop);
- };
- //our GameFramework returns a public API visible from outside its scope
- return {
- start: start
- };
- };
Explanations:
- Note that we now start the game engine in a window.onload callback (line 2), so only after the page has been loaded.
- We also moved 99% of the init() method from the previous example into the start() method of the game engine, and added thecanvas, ctx, w, h variables as global variables to the game framework object.
- Finally, in the main loop we added a call to the drawMonster() function, injecting randomicity through the parameters: the monster is drawn with an x,y offset of between 0 and 10, in successive frames of the animation.
- And we clear the previous canvas content before drawing the current frame (line 35).
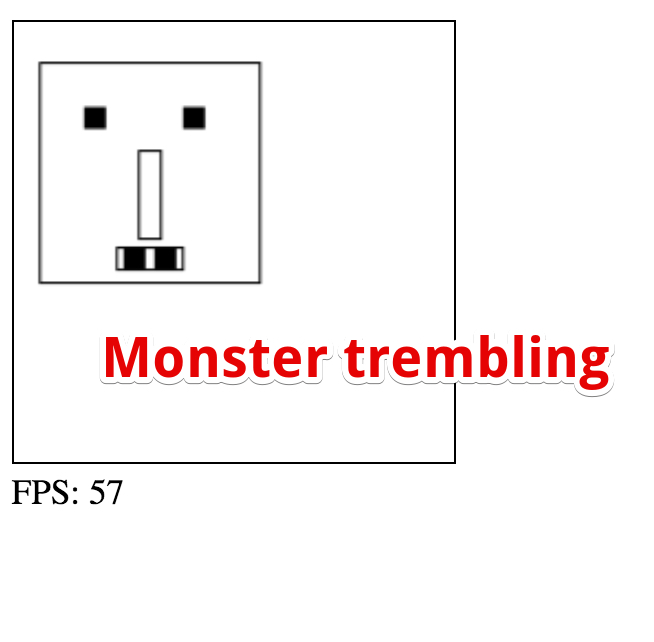
If you try the example, you will see a trembling monster. The canvas is cleared and the monster drawn in random positions, at around 60 times per second!
In the next part of this week’s course, we’ll see how to interact with it using the mouse or the keyboard.
