Animating multiple objects
Introduction
In this section we will see how we can animate and control not only the player but also other objects on the screen.
Let’s study a simple example: animating a few balls and detecting collisions with the surrounding walls. For the sake of simplicity, we will not use time-based animation in the first examples.
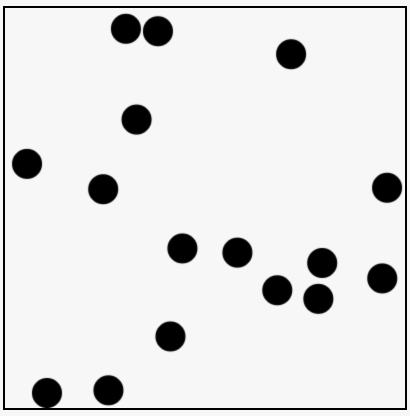
animating multiple balls which bounce off horizontal and vertical walls
In this example, we define a constructor function for creating balls. This is a way to design JavaScript “pseudo classes” as found in other object-oriented languages like Java, C# etc. It’s useful when you plan to create many objects of the same class. Using this we could animate hundreds of balls on the screen.
Each ball has an x and y position, and in this example, instead of working with angles, we defined two “speeds” – horizontal and vertical speeds – in the form of the increments we will add to the x and y positions at each frame of animation. We also added a variable for adjusting the size of the balls: the radius.
Here is the constructor function for building balls:
- // Constructor function for balls
- function Ball(x, y, vx, vy, diameter) {
- // property of each ball: a x and y position, speeds, radius
- this.x = x;
- this.y = y;
- this.vx = vx;
- this.vy = vy;
- this.radius = diameter/2;
- // methods
- this.draw = function() {
- ctx.beginPath();
- ctx.arc(this.x, this.y, this.radius, 0, 2*Math.PI);
- ctx.fill();
- };
- this.move = function() {
- // add horizontal increment to the x pos
- // add vertical increment to the y pos
- this.x += this.vx;
- this.y += this.vy;
- };
- }
Using a constructor function makes it easy to build new balls as follows:
- var b1 = new Ball(10, 10, 2, 2, 5); // x, y, vx, vy, radius
- var b1 = new Ball(100, 130, 4, 5, 5);
- etc…
We defined two methods in the constructor function for moving the ball and for drawing the ball as a black filled circle. Here is the syntax for moving and drawing a ball:
- b1.draw();
- b1.move();
We will call these methods from inside the mainLoop, and as you’ll see, we will create many balls. This object-oriented design makes it easier to handle large quantities.
Here is the rest of the code from this example:
- var canvas, ctx, width, height;
- // array of balls to animate
- var ballArray = [];
- function init() {
- canvas = document.querySelector(“#myCanvas”);
- ctx = canvas.getContext(‘2d’);
- width = canvas.width;
- height = canvas.height;
- // try to change this number
- createBalls(16);
- requestAnimationFrame(mainLoop);
- }
- function createBalls(numberOfBalls) {
- for(var i=0; i < numberOfBalls; i++) {
- // Create a ball with random position and speed.
- // You can change the radius
- var ball = new Ball(width*Math.random(),
- height*Math.random(),
- (10*Math.random())-5,
- (10*Math.random())-5,
- 30);
- // add the ball to the array
- ballArray[i] = ball;
- }
- }
- function mainLoop() {
- // clear the canvas
- ctx.clearRect(0, 0, width, height);
- // for each ball in the array
- for(var i=0; i < ballArray.length; i++) {
- var ball = ballArray[i];
- // 1) move the ball
- ball.move();
- // 2) test if the ball collides with a wall
- testCollisionWithWalls(ball);
- // 3) draw the ball
- ball.draw();
- }
- // ask for a new frame of animation at 60f/s
- window.requestAnimationFrame(mainLoop);
- }
- function testCollisionWithWalls(ball) {
- // left
- if (ball.x < ball.radius) { // x and y of the ball are at the center of the circle
- ball.x = ball.radius; // if collision, we replace the ball at a position
- ball.vx *= –1; // where it’s exactly in contact with the left border
- } // and we reverse the horizontal speed
- // right
- if (ball.x > width – (ball.radius)) {
- ball.x = width – (ball.radius);
- ball.vx *= –1;
- }
- // up
- if (ball.y < ball.radius) {
- ball.y = ball.radius;
- ball.vy *= –1;
- }
- // down
- if (ball.y > height – (ball.radius)) {
- ball.y = height – (ball.radius);
- ball.vy *= –1;
- }
- }
Notice that:
- All the balls are stored in an array (line 4),
- We wrote a createBalls(nb) function that creates a given number of balls (and stores them in the array) with random values for position and speed (lines 18-32)
- In the mainLoop, we iterate on the array of balls and for each ball we: 1) move it, 2) test if it collides with the boundaries of the canvas (in the function testCollisionWithWalls), and 3) we draw the balls (lines 38-50). The order of these steps is not critical and may be changed.
- The function that tests collisions is straightforward (lines 55-76). We did not use “if… else if” since a ball may sometimes touch two walls at once (in the corners). In that rare case, we need to invert both the horizontal and vertical speeds. When a ball collides with a wall, we need to replace it in a position where it is no longer against the wall (otherwise it will collide again during the next animation loop execution).
similar example but with the ball direction as an angle, and a single velocity variable
Try this example at JSBin: it behaves in the same way as the previous example.
Note that we just changed the way we designed the balls and computed the angles after they rebound from the walls. The changes are highlighted in bold:
- var canvas, ctx, width, height;
- // Array of balls to animate
- var ballArray = [];
- function init() {
- …
- }
- function createBalls(numberOfBalls) {
- for(var i=0; i < numberOfBalls; i++) {
- // Create a ball with random position and speed.
- // You can change the radius
- var ball = new Ball(width*Math.random(),
- height*Math.random(),
- (2*Math.PI)*Math.random(), // angle
- (10*Math.random())-5, // speed
- 30);
- // We add it in an array
- ballArray[i] = ball;
- }
- }
- function mainLoop() {
- …
- }
- function testCollisionWithWalls(ball) {
- // left
- if (ball.x < ball.radius) {
- ball.x = ball.radius;
- ball.angle = –ball.angle + Math.PI;
- }
- // right
- if (ball.x > width – (ball.radius)) {
- ball.x = width – (ball.radius);
- ball.angle = –ball.angle + Math.PI;
- }
- // up
- if (ball.y < ball.radius) {
- ball.y = ball.radius;
- ball.angle = –ball.angle;
- }
- // down
- if (ball.y > height – (ball.radius)) {
- ball.y = height – (ball.radius);
- ball.angle =-ball.angle;
- }
- }
- // constructor function for balls
- function Ball(x, y, angle, v, diameter) {
- this.x = x;
- this.y = y;
- this.angle = angle;
- this.v = v;
- this.radius = diameter/2;
- this.draw = function() {
- …
- };
- this.move = function() {
- // add horizontal increment to the x pos
- // add vertical increment to the y pos
- this.x += this.v * Math.cos(this.angle);
- this.y += this.v * Math.sin(this.angle);
- };
- }
Using angles or horizontal and vertical increments is equivalent. However, one method might be preferable to the other: for example, to control an object that follows the mouse, or that tracks another object in order to attack it, angles would be more practical input to the computations required.
